前后端分离的情况下,SpringBoot与前端的数据交互(Ajax与JSON)。
关于前后端分离与Ajax的理解
前面我们说到的,使用Thyleaf模板引擎进行数据传输,只适合前后端不分离的情况下。其实除了使用硬编码进行数据传输之外,我们也可以通过Ajax请求进行数据交互。
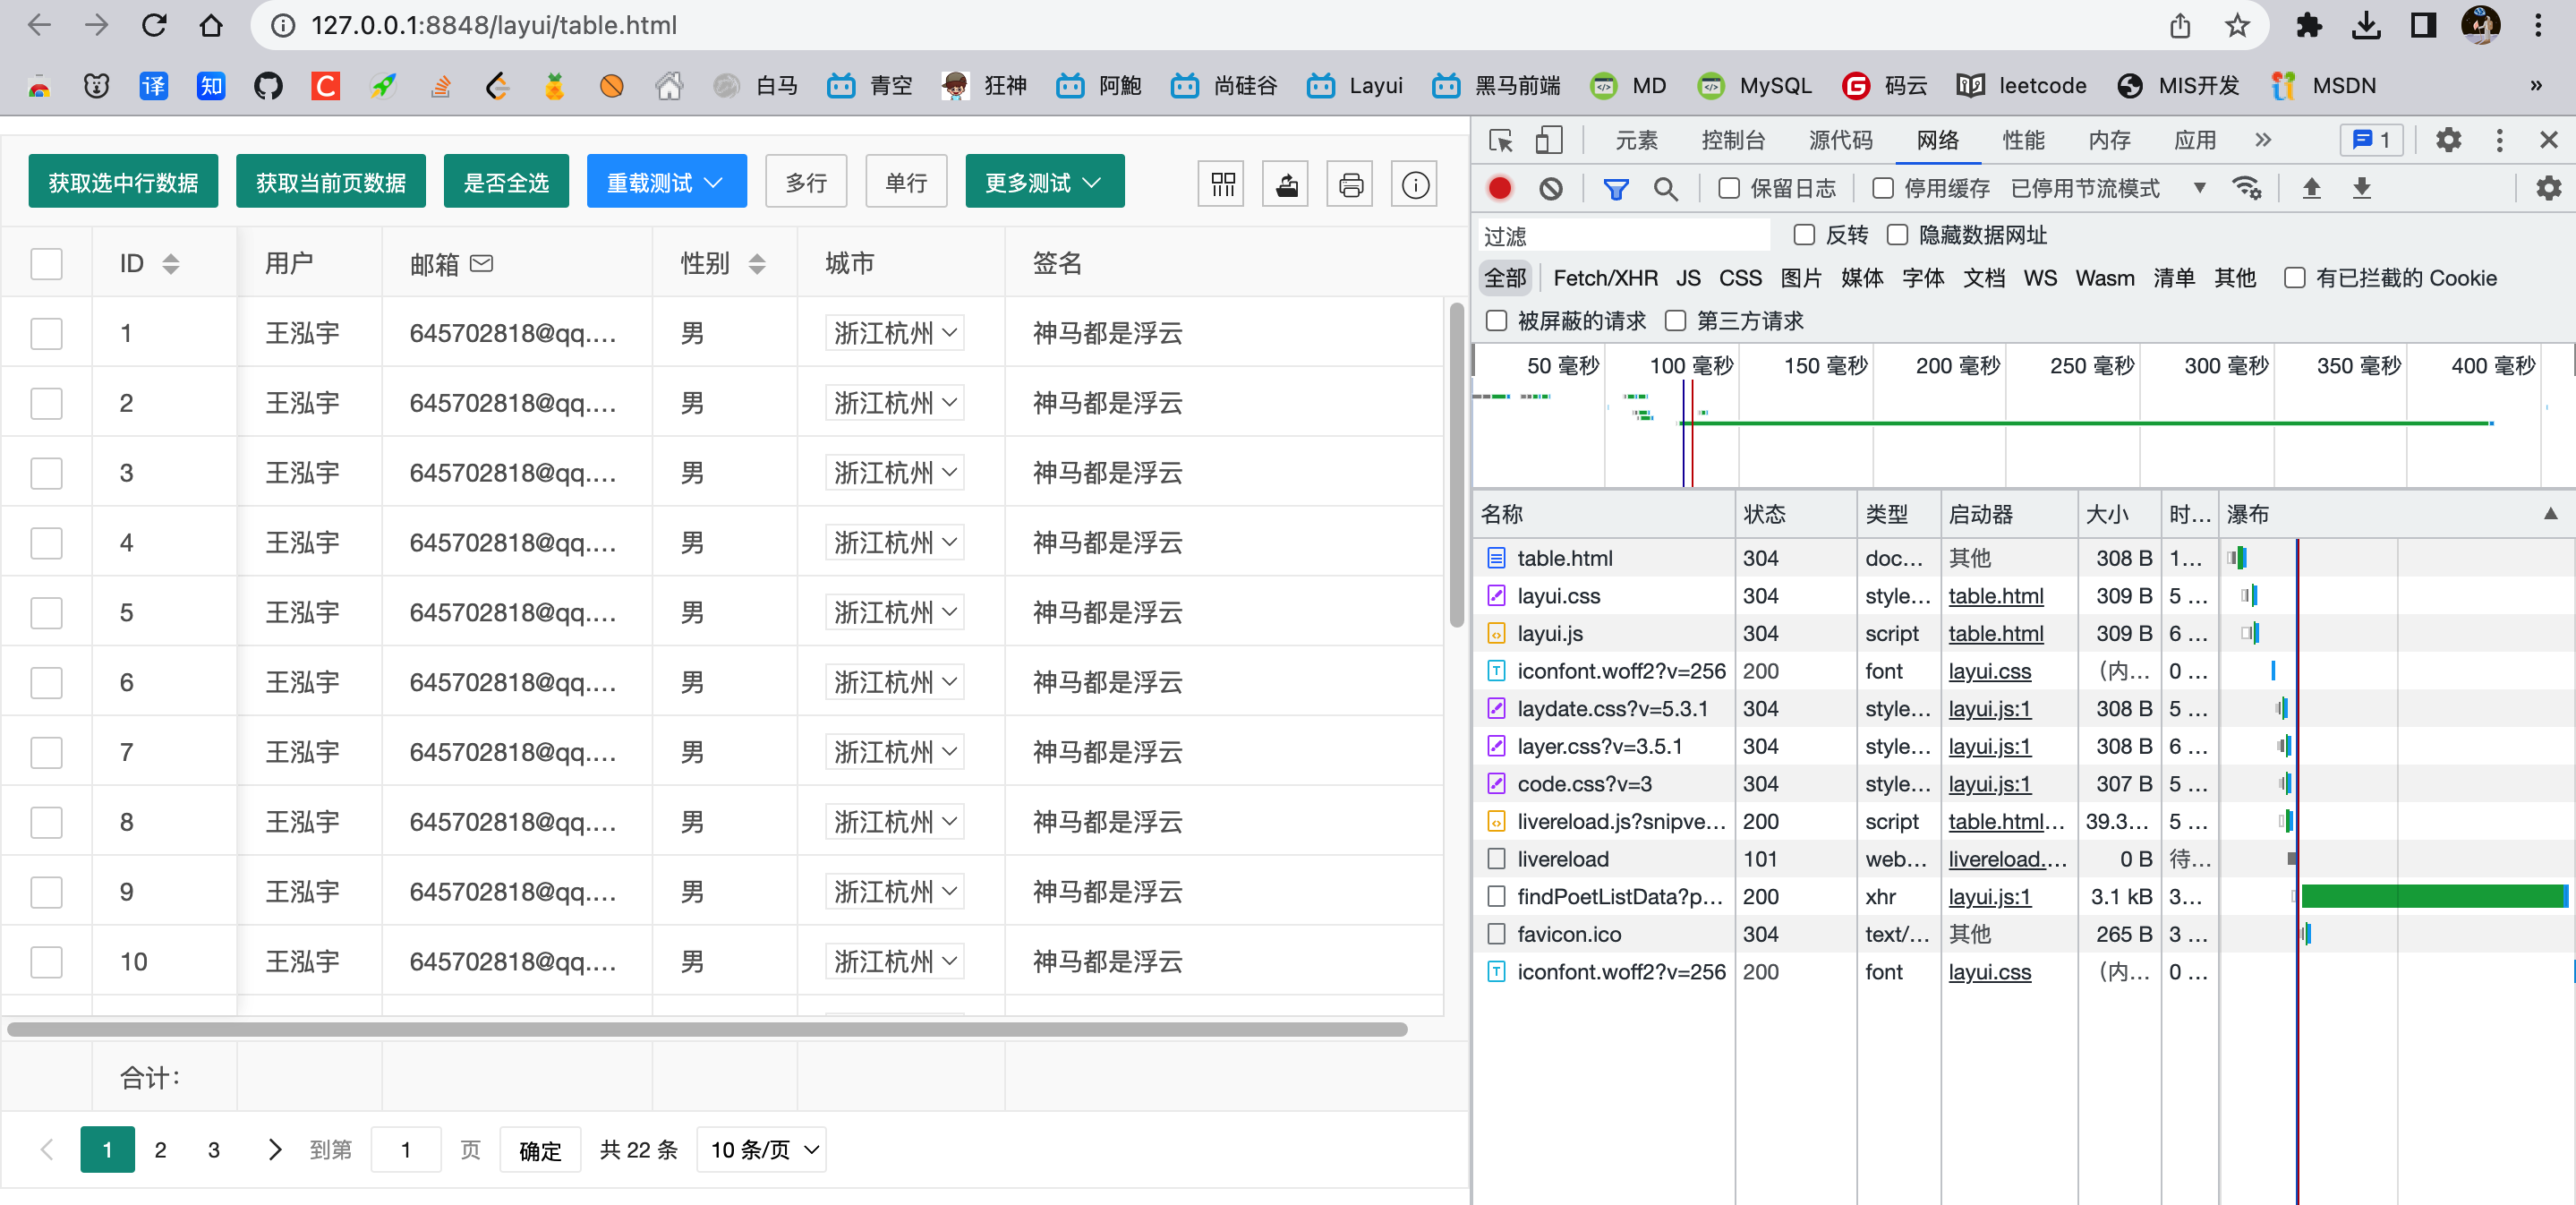
我们使用的LayUI就是通过Ajax请求进行数据传输的。LayUI向后端发送Ajax请求,后端给前端发送JSON数据。
其实单论使用Ajax求和json数据,我们可以前后端不分离,也可以分离。
在controller层,如果前后端不分离的话,我们就可以通过spring对thymeleaf的支持进行纯页面反馈。如果前后端分离的话,我们就不需要再controller层进行页面跳转,可以通过纯前端的方式进行。
在前端LayUI的Ajax请求里面,如果前后端不分离,那么我们就可以直接把controller的路径写在请求的url里面。如果分离的话,我们需要把后端的路径完整的写在请求里。
那么下面我们就主要以前后端分离的情况下,讲述Ajax和Controller的数据交互。
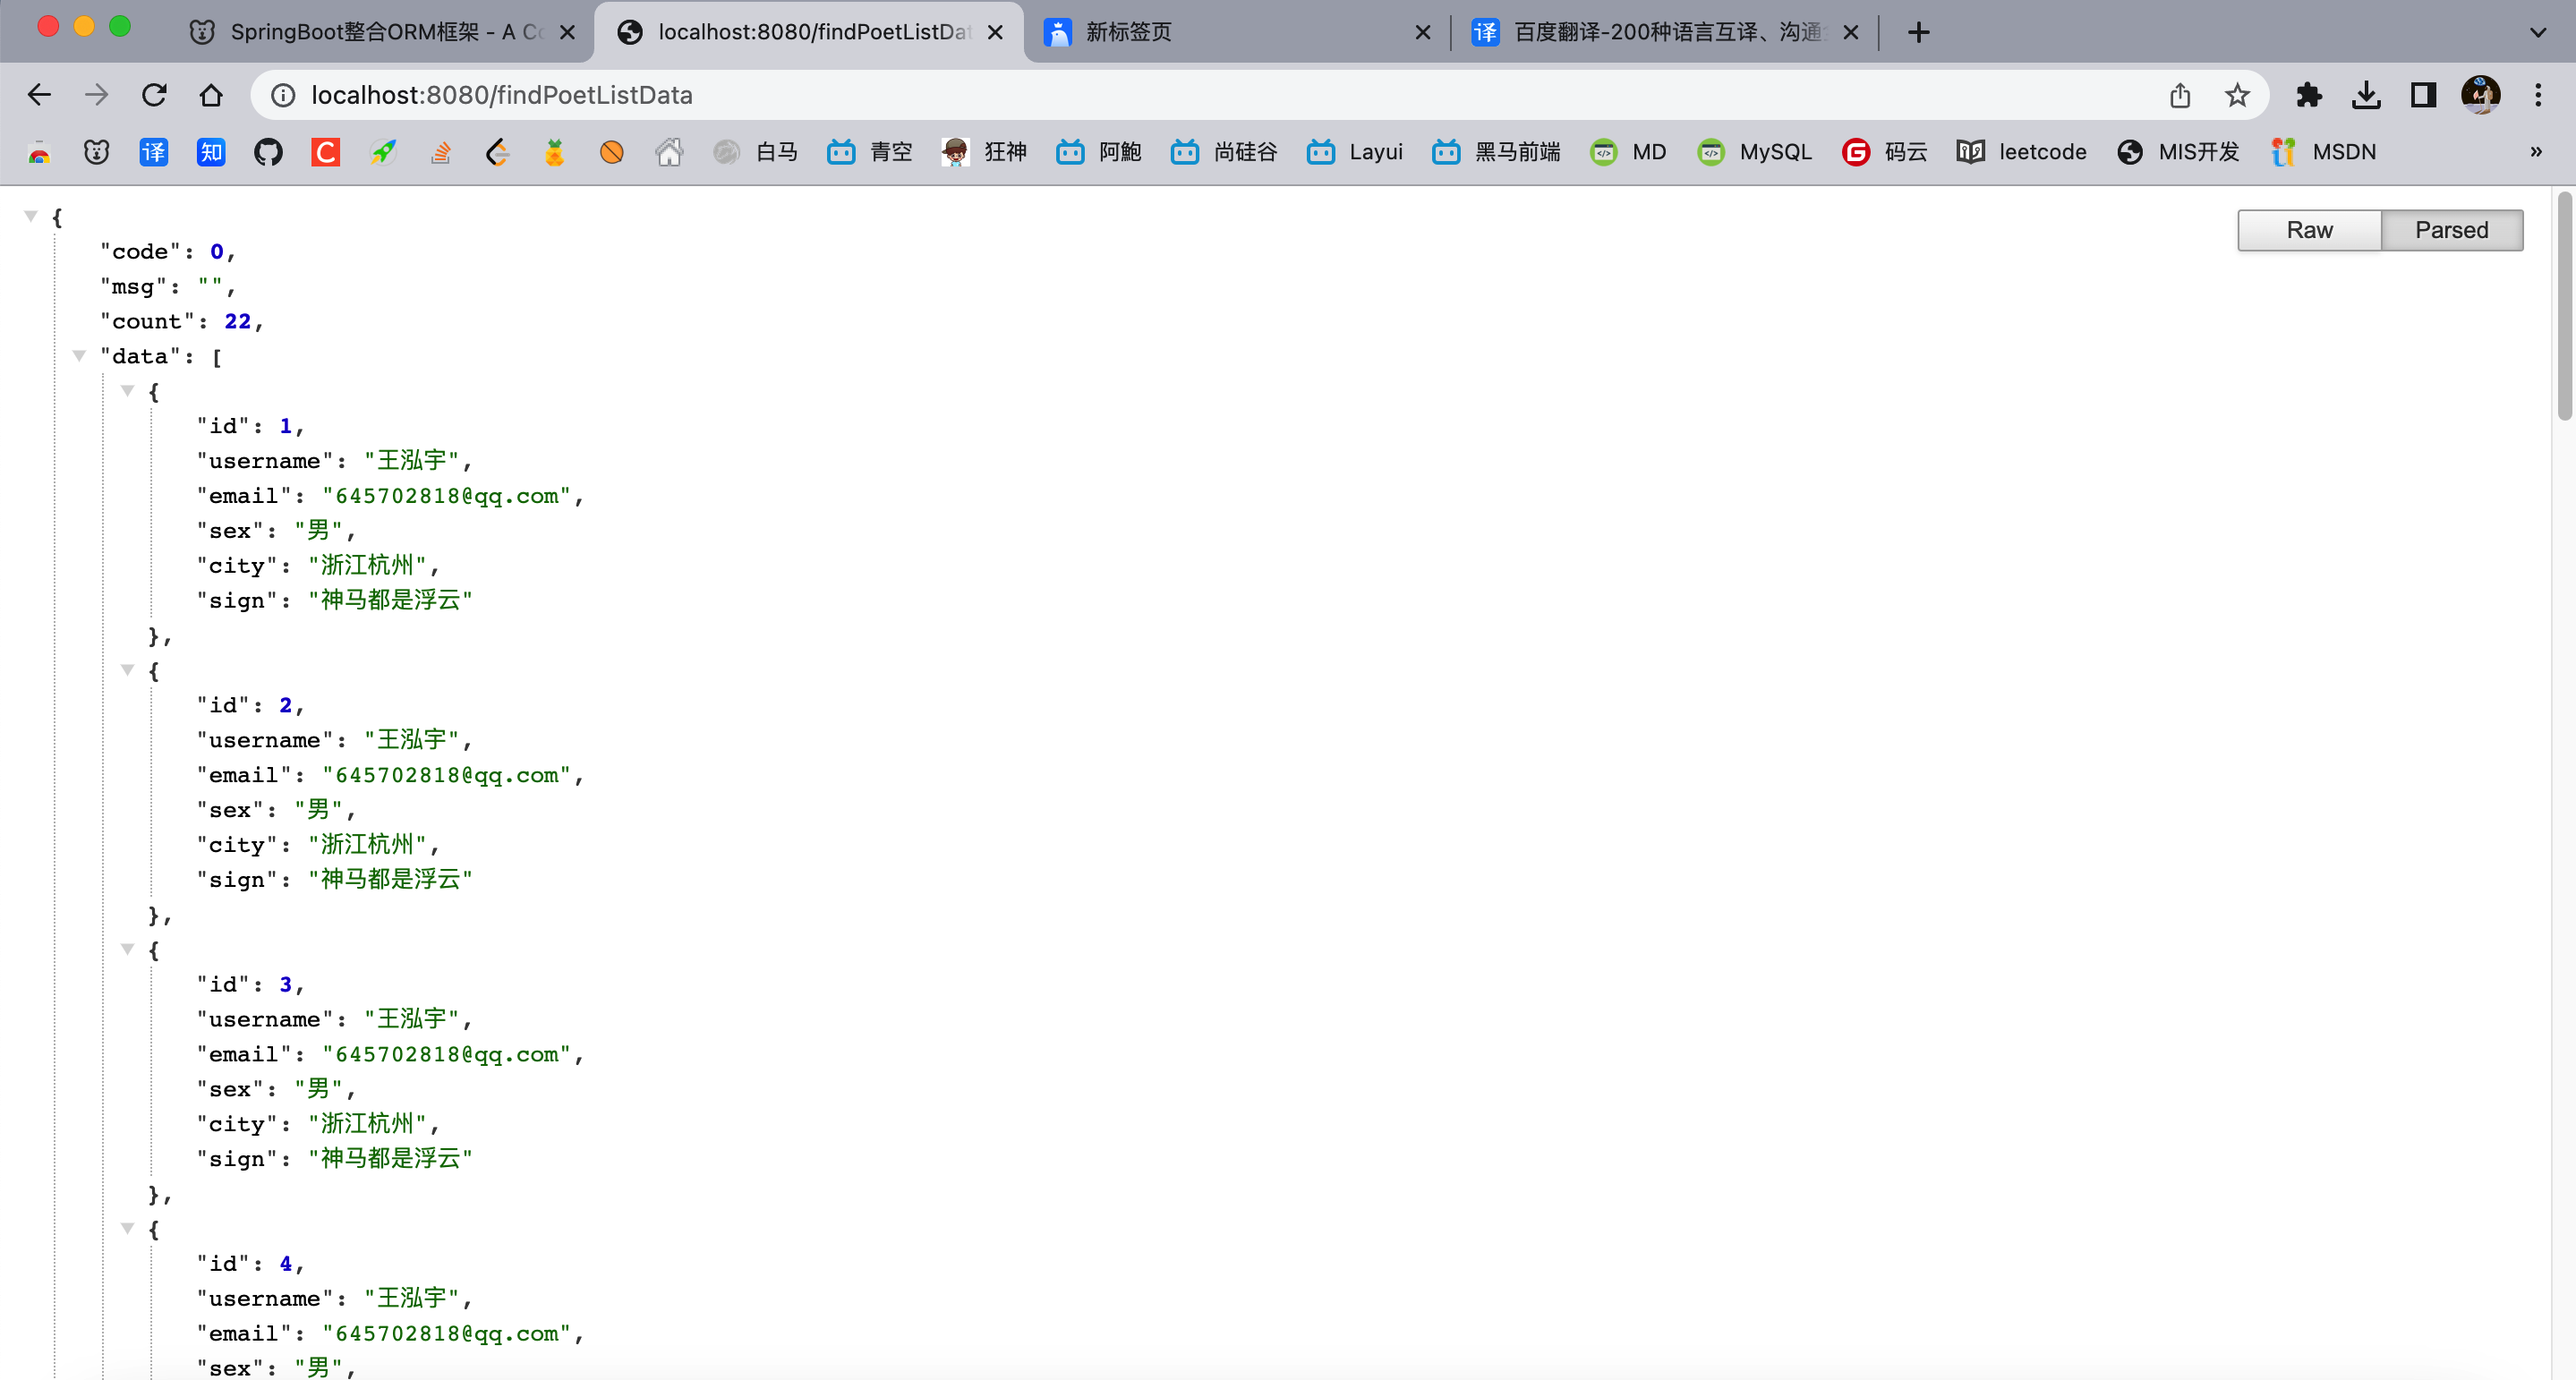
后端给前端提供JSON
下面我们演示的是LayUI+SpringBoot的前后端分离数据请求情况。其实我们发现前后端分离或是不分离,Controller的
前端通过ajax向SpringBoot后端发起请求,申请json数据,前后分离。
前端代码与JSON修改
其实JSON作为前端和后端的传输数据格式,我们本没有必要将json文件进行更改,但是我们先将前端和json同时进行修改,然后再将后端的返回值返回成JSON对应的格式就可以了。
JSON内容就不变了,给前端减少一点字段,方便我们进行数据库书写。
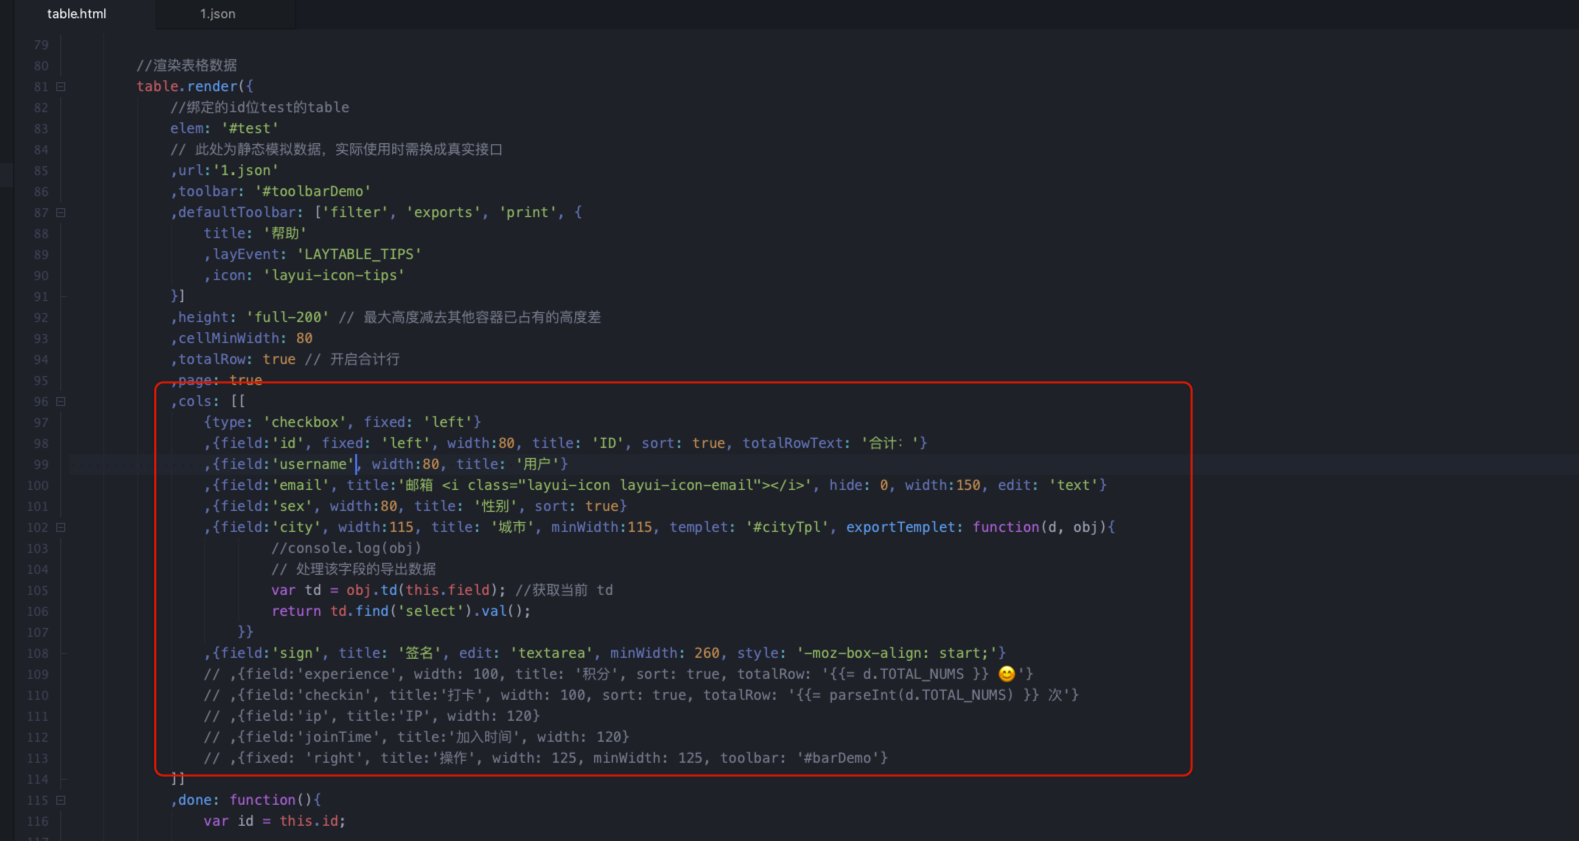
前端请求的时候会携带page和limit,我们不用接收,也不用管。
SpringBoot环境部署
- pom.xml依赖导入(mysql,mybatisplus,lombok,web,thymeleaf)
1
2
3
4
5
6
7
8
9
10
11
12
13
14
15
16
17
18
19
20
21
22
23
24
25
26
27
28
|
<dependency>
<groupId>org.springframework.boot</groupId>
<artifactId>spring-boot-starter-thymeleaf</artifactId>
</dependency>
<dependency>
<groupId>org.springframework.boot</groupId>
<artifactId>spring-boot-starter-web</artifactId>
</dependency>
<dependency>
<groupId>mysql</groupId>
<artifactId>mysql-connector-java</artifactId>
<version>8.0.30</version>
</dependency>
<dependency>
<groupId>org.projectlombok</groupId>
<artifactId>lombok</artifactId>
<optional>true</optional>
</dependency>
<dependency>
<groupId>com.baomidou</groupId>
<artifactId>mybatis-plus-boot-starter</artifactId>
<version>3.5.2</version>
</dependency>
|
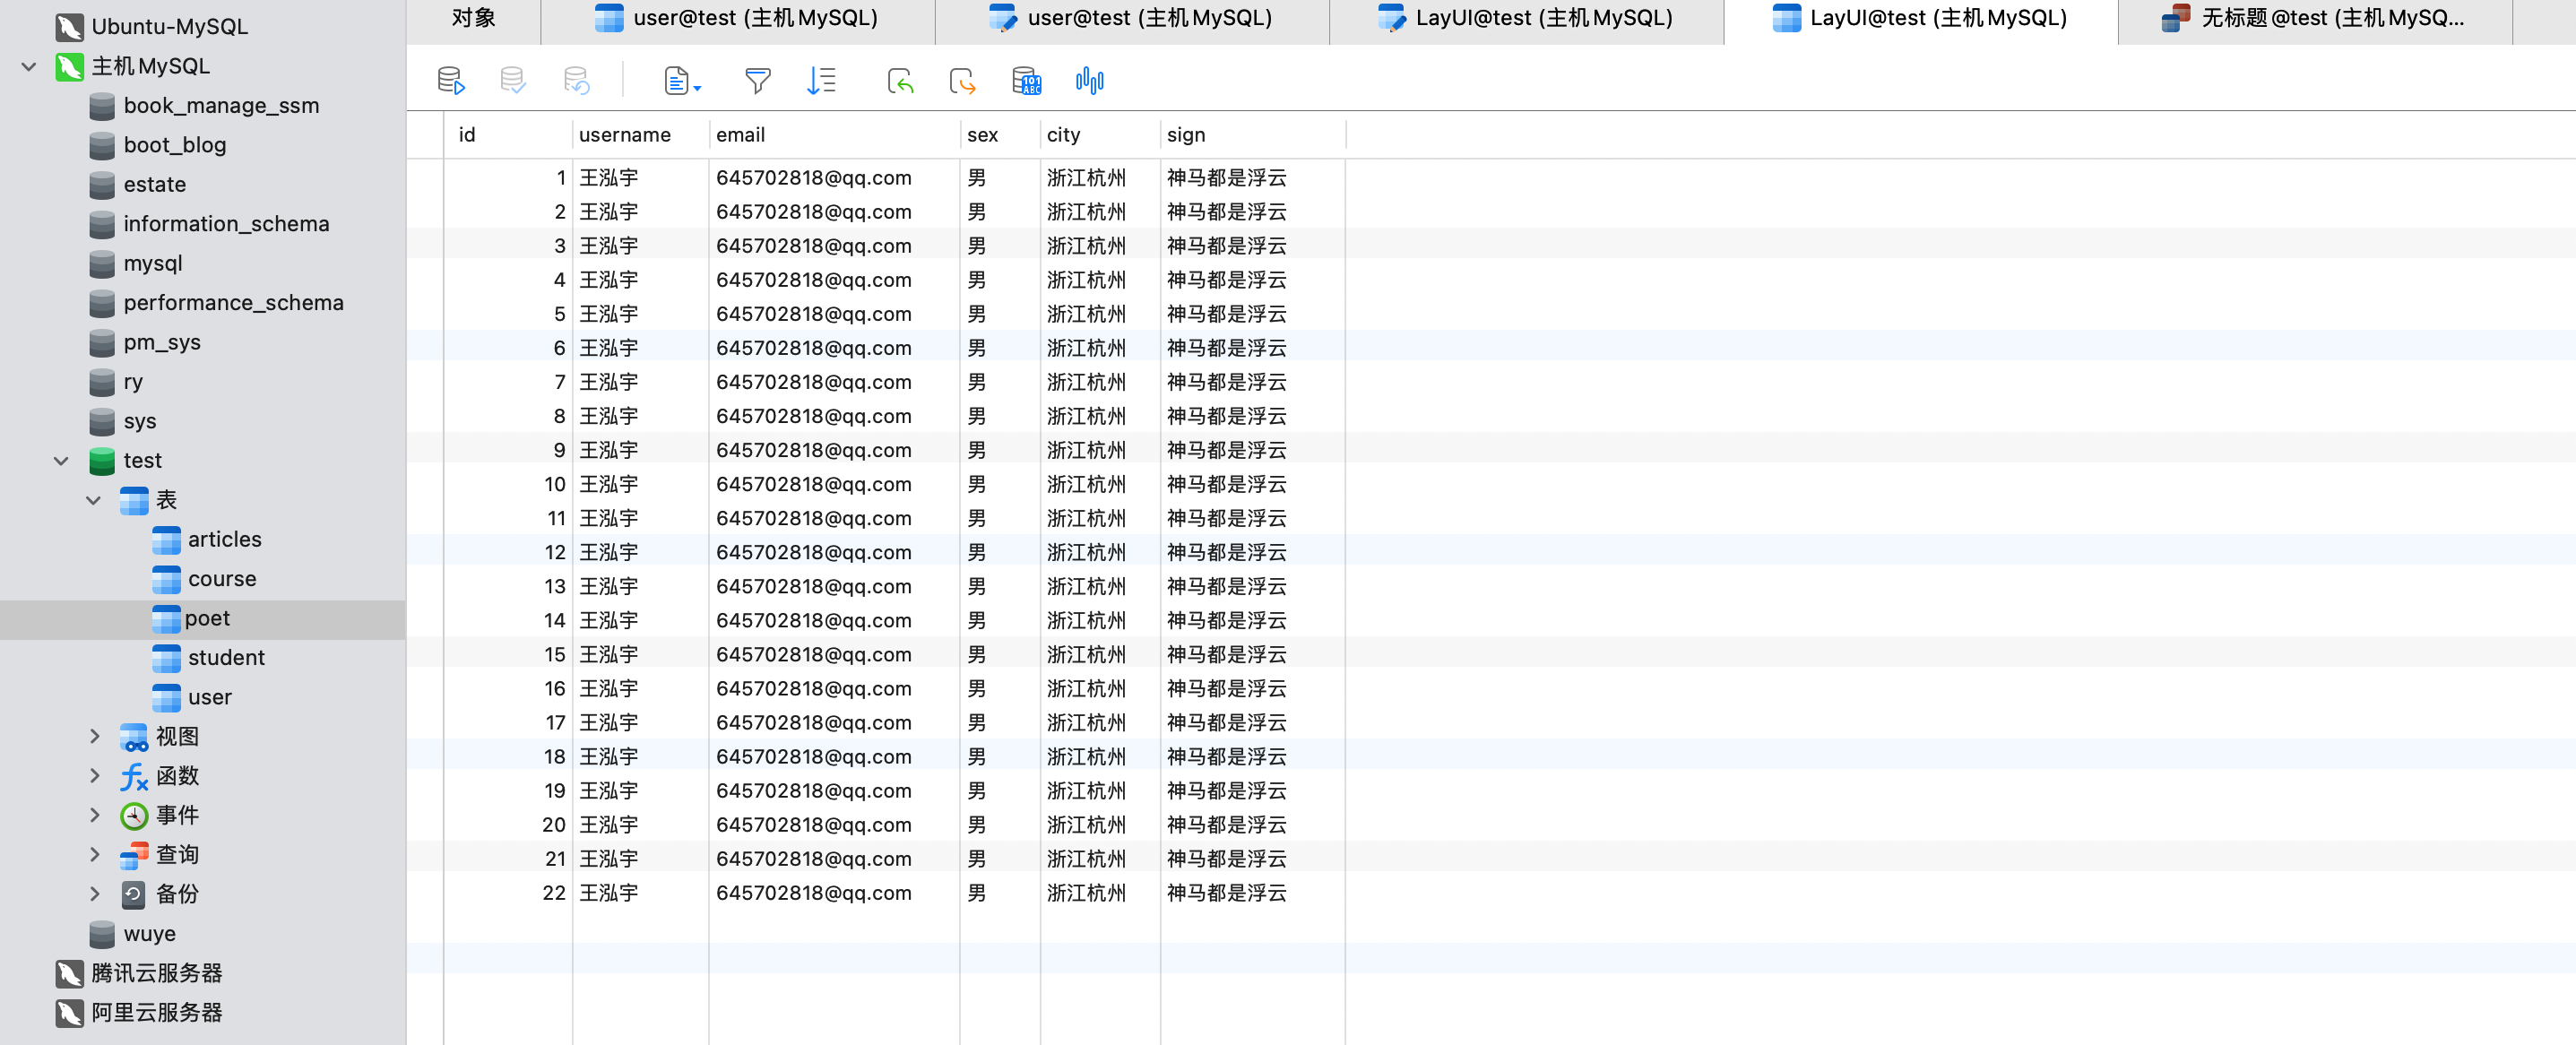
- 数据库环境配置,此处为了代码方便,决定先从数据库直通controller,但是实际情况下的情况一定会更加复杂,可能会出现多个数据库表或者实体类组合成一个实体类的情况。
- application.yml配置文件(配置数据库信息、MybatisPlus日志)
1
2
3
4
5
6
7
8
9
| �spring:
datasource:
driver-class-name: com.mysql.cj.jdbc.Driver
url: jdbc:mysql://localhost:3306/test?serverTimezone=UTC&useUnicode=true&characterEncoding=utf-8
username: root
password: 123456
mybatis-plus:
configuration:
log-impl: org.apache.ibatis.logging.stdout.StdOutImpl
|
1
2
3
4
5
6
7
8
9
| @SpringBootApplication
@MapperScan("com.example.mapper")
public class Application {
public static void main(String[] args) {
SpringApplication.run(Application.class, args);
}
}
|
后端代码
1
2
3
4
5
6
7
8
9
10
11
12
| @Data
public class Poet {
Integer id;
String username;
String email;
String sex;
String city;
String sign;
}
|
1
2
3
| @Mapper
public interface PoetMapper extends BaseMapper<Poet> {
}
|
1
2
3
4
5
6
7
8
9
| @Data
public class DataVo<T> {
private Integer code;
private String msg;
private Integer count;
private List<T> data;
}
|
1
2
3
4
| public interface PoetService {
DataVo<Poet> findPoetList();
}
|
1
2
3
4
5
6
7
8
9
10
11
12
13
14
15
16
17
18
19
20
21
| @Service
public class PoetServiceImpl implements PoetService {
@Resource
PoetMapper mapper;
@Override
public DataVo<Poet> findPoetList() {
DataVo dataVo = new DataVo<>();
dataVo.setCode(0);
dataVo.setMsg("");
dataVo.setCount(Math.toIntExact(mapper.selectCount(null)));
List<Poet> list = mapper.selectList(null);
dataVo.setData(list);
return dataVo;
}
}
|
1
2
3
4
5
6
7
8
9
10
11
12
| @RestController
@CrossOrigin
public class UserController {
@Resource
PoetService service;
@RequestMapping("/findPoetListData")
public DataVo findPoetList(){
return service.findPoetList();
}
}
|
跨域请求配置并运行

https://blog.csdn.net/JokerLJG/article/details/123659384
方式一:创建CROS配置类实现WebMvcConfigurer接口。
1
2
3
4
5
6
7
8
9
10
11
12
13
14
| @Configuration
public class WebMvcConfig implements WebMvcConfigurer {
@Override
public void addCorsMappings(CorsRegistry registry) {
registry.addMapping("/**")
.allowedOrigins("http://127.0.0.1:8848")
.allowedHeaders("*")
.allowedMethods("*")
.allowCredentials(true);
}
}
|
方式二:在需要跨域请求的Controller文件上或者Controller的方法上,添加@CrossOrigin注解
1
2
3
4
5
6
7
8
9
10
11
12
| @RestController
@CrossOrigin
public class UserController {
@Resource
PoetService service;
@RequestMapping("/findPoetListData")
public DataVo findPoetList(){
return service.findPoetList();
}
}
|
1
2
3
4
5
6
7
8
9
10
11
12
| @RestController
public class UserController {
@Resource
PoetService service;
@CrossOrigin
@RequestMapping("/findPoetListData")
public DataVo findPoetList(){
return service.findPoetList();
}
}
|
前端给后端发送请求
纯前端页面跳转
前端可以通过纯页面进行页面切换,如果是前后端不分离可以通过请求后端controller返回页面(只有点后端分离才能实现Controller返回页面:return "index";)。
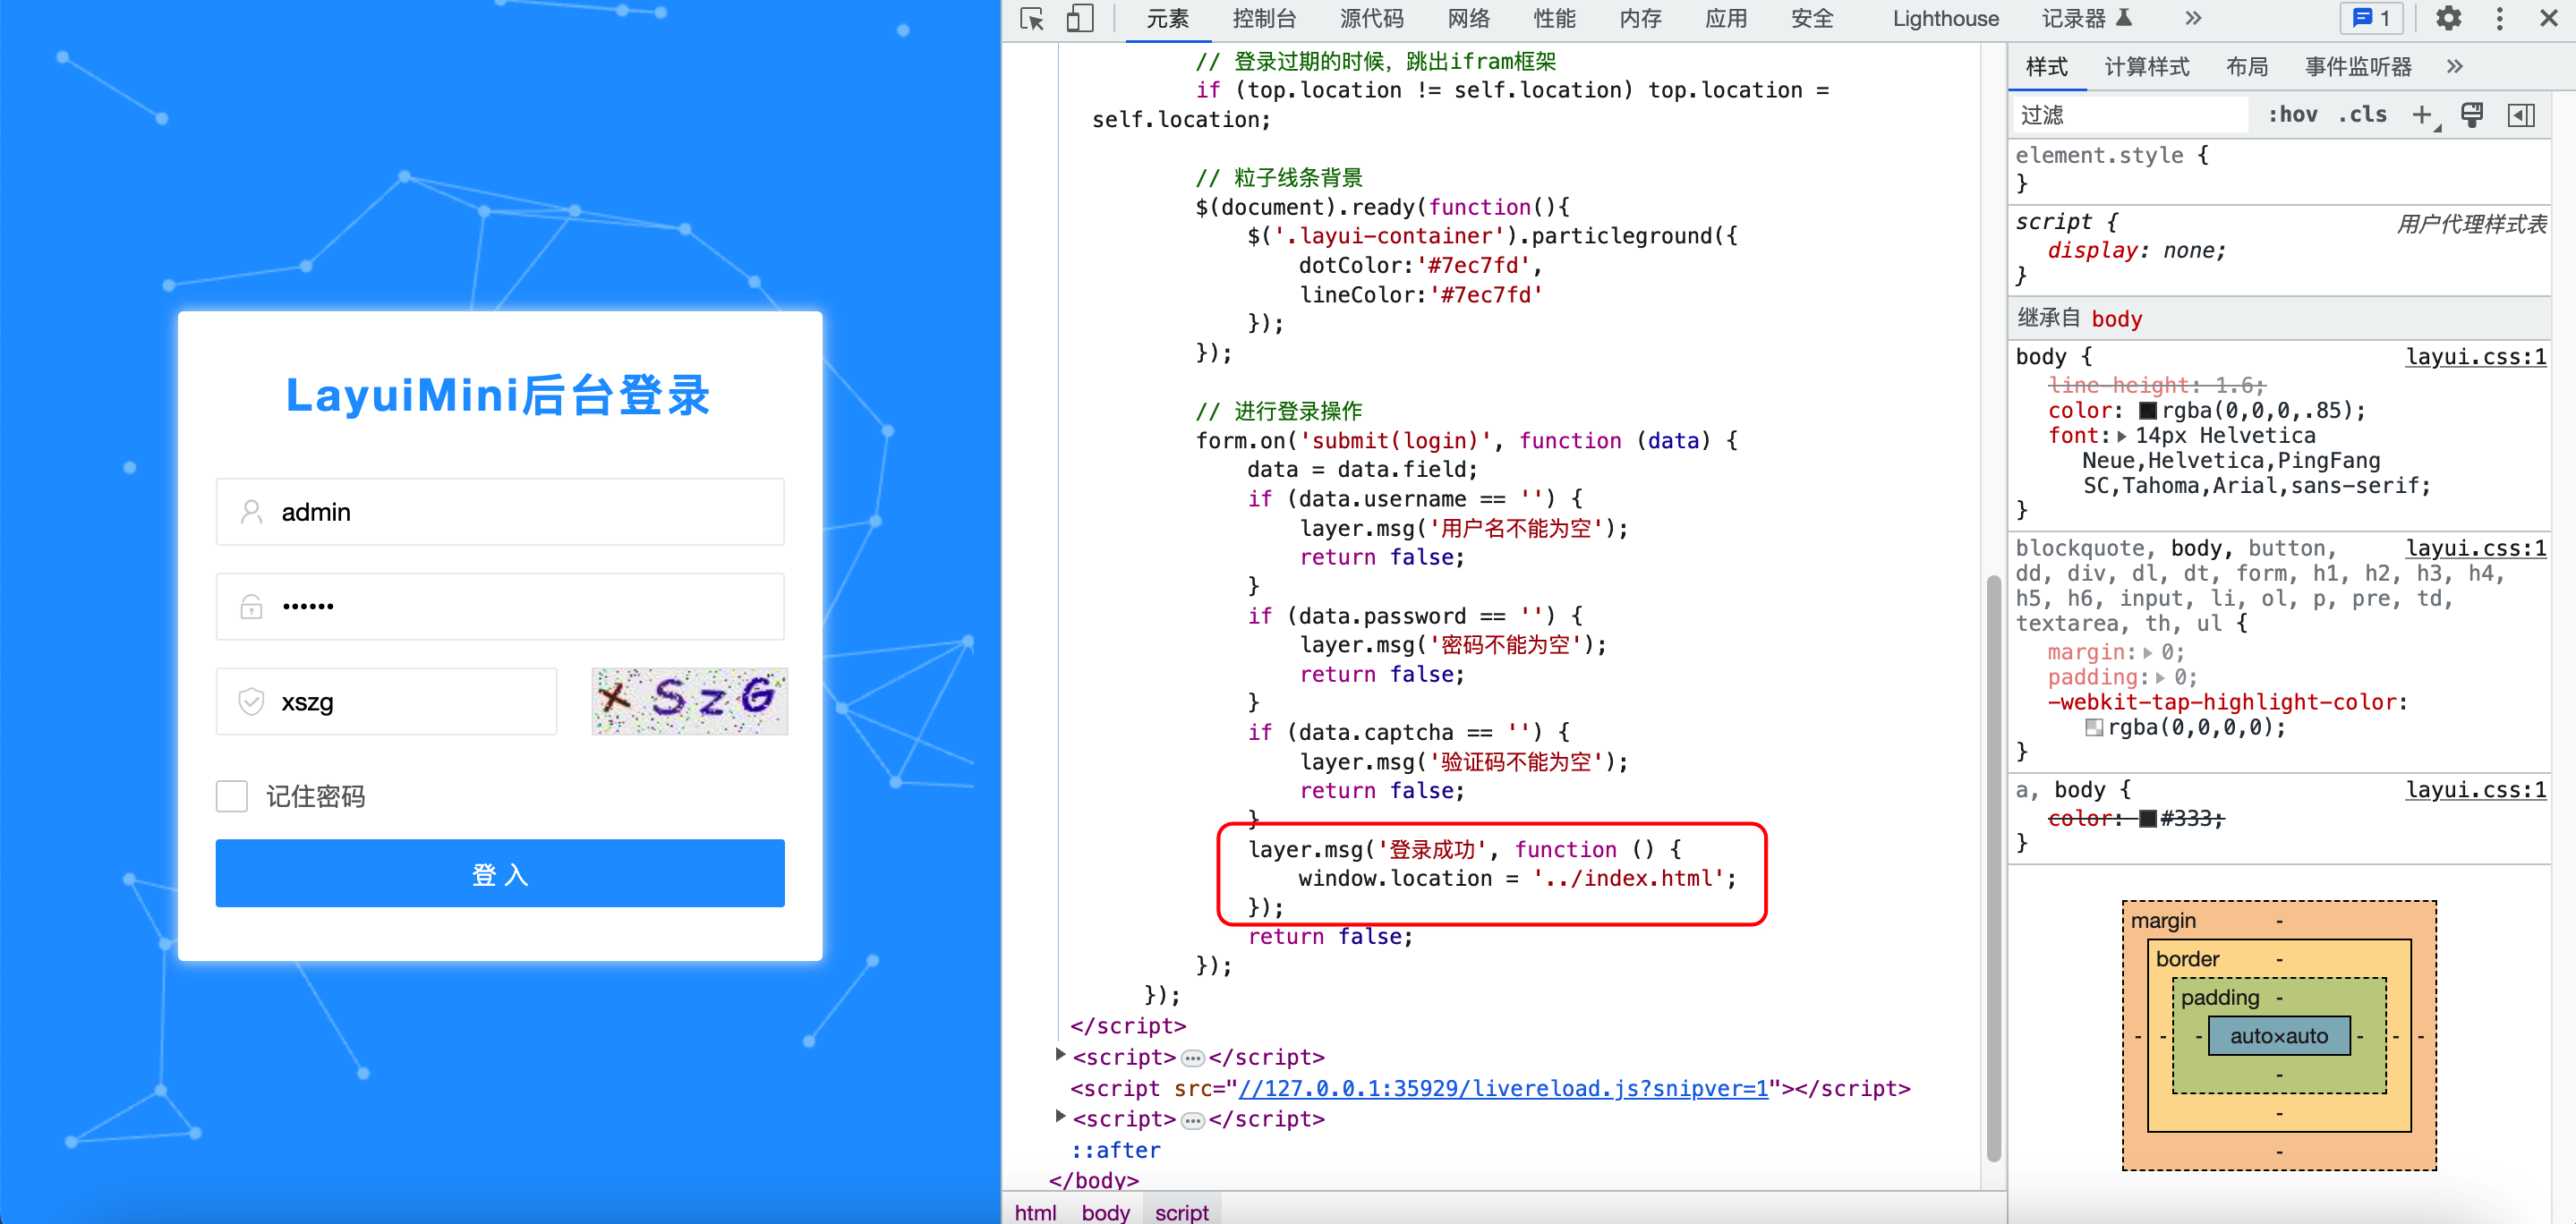
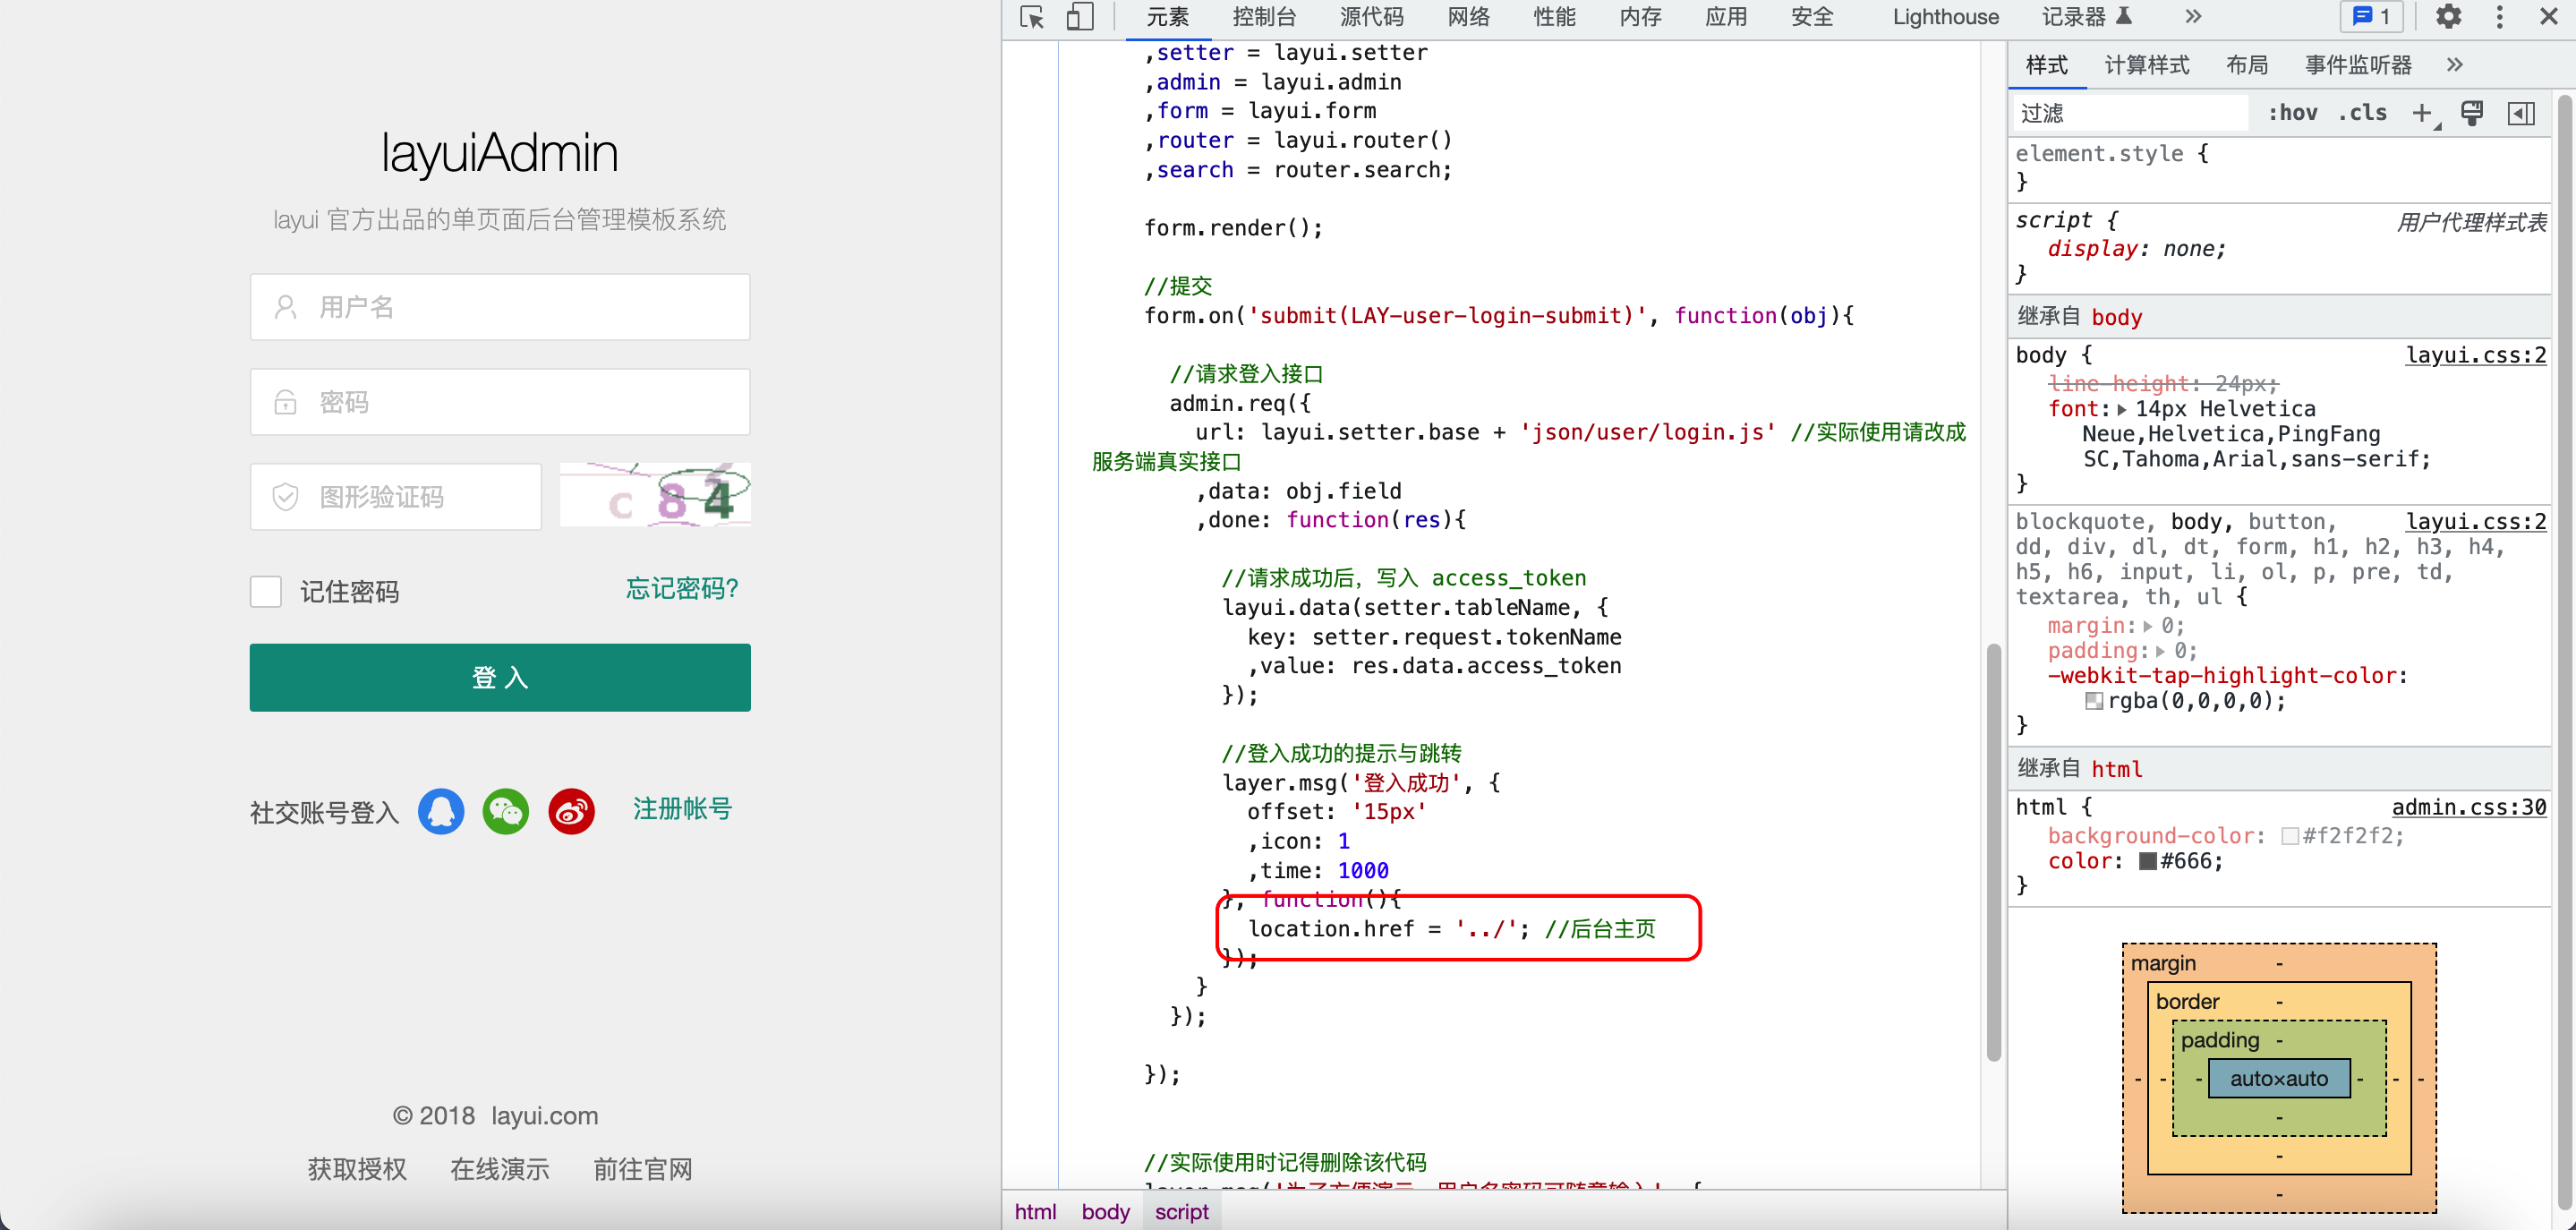
Ajax+Controller页面跳转
1
2
3
4
5
6
7
8
9
10
11
12
13
14
15
16
17
18
19
20
21
22
23
24
25
26
27
28
29
|
form.on('submit(login-submit)', function (obj) {
$.ajax({
type: "post",
contentType: 'application/json',
url: "/api/loginByPassword",
data: JSON.stringify(obj.field),
dataType: 'json',
success: function (data) {
if (data.code == '200') {
layer.msg('登录成功',
{
icon: 1,
time: 1500
}, function () {
location.replace('/user/index')
})
} else {
layer.alert(data.msg, {icon: 2}, function (index) {
layer.close(index);
});
}
}
})
return false;
});
|
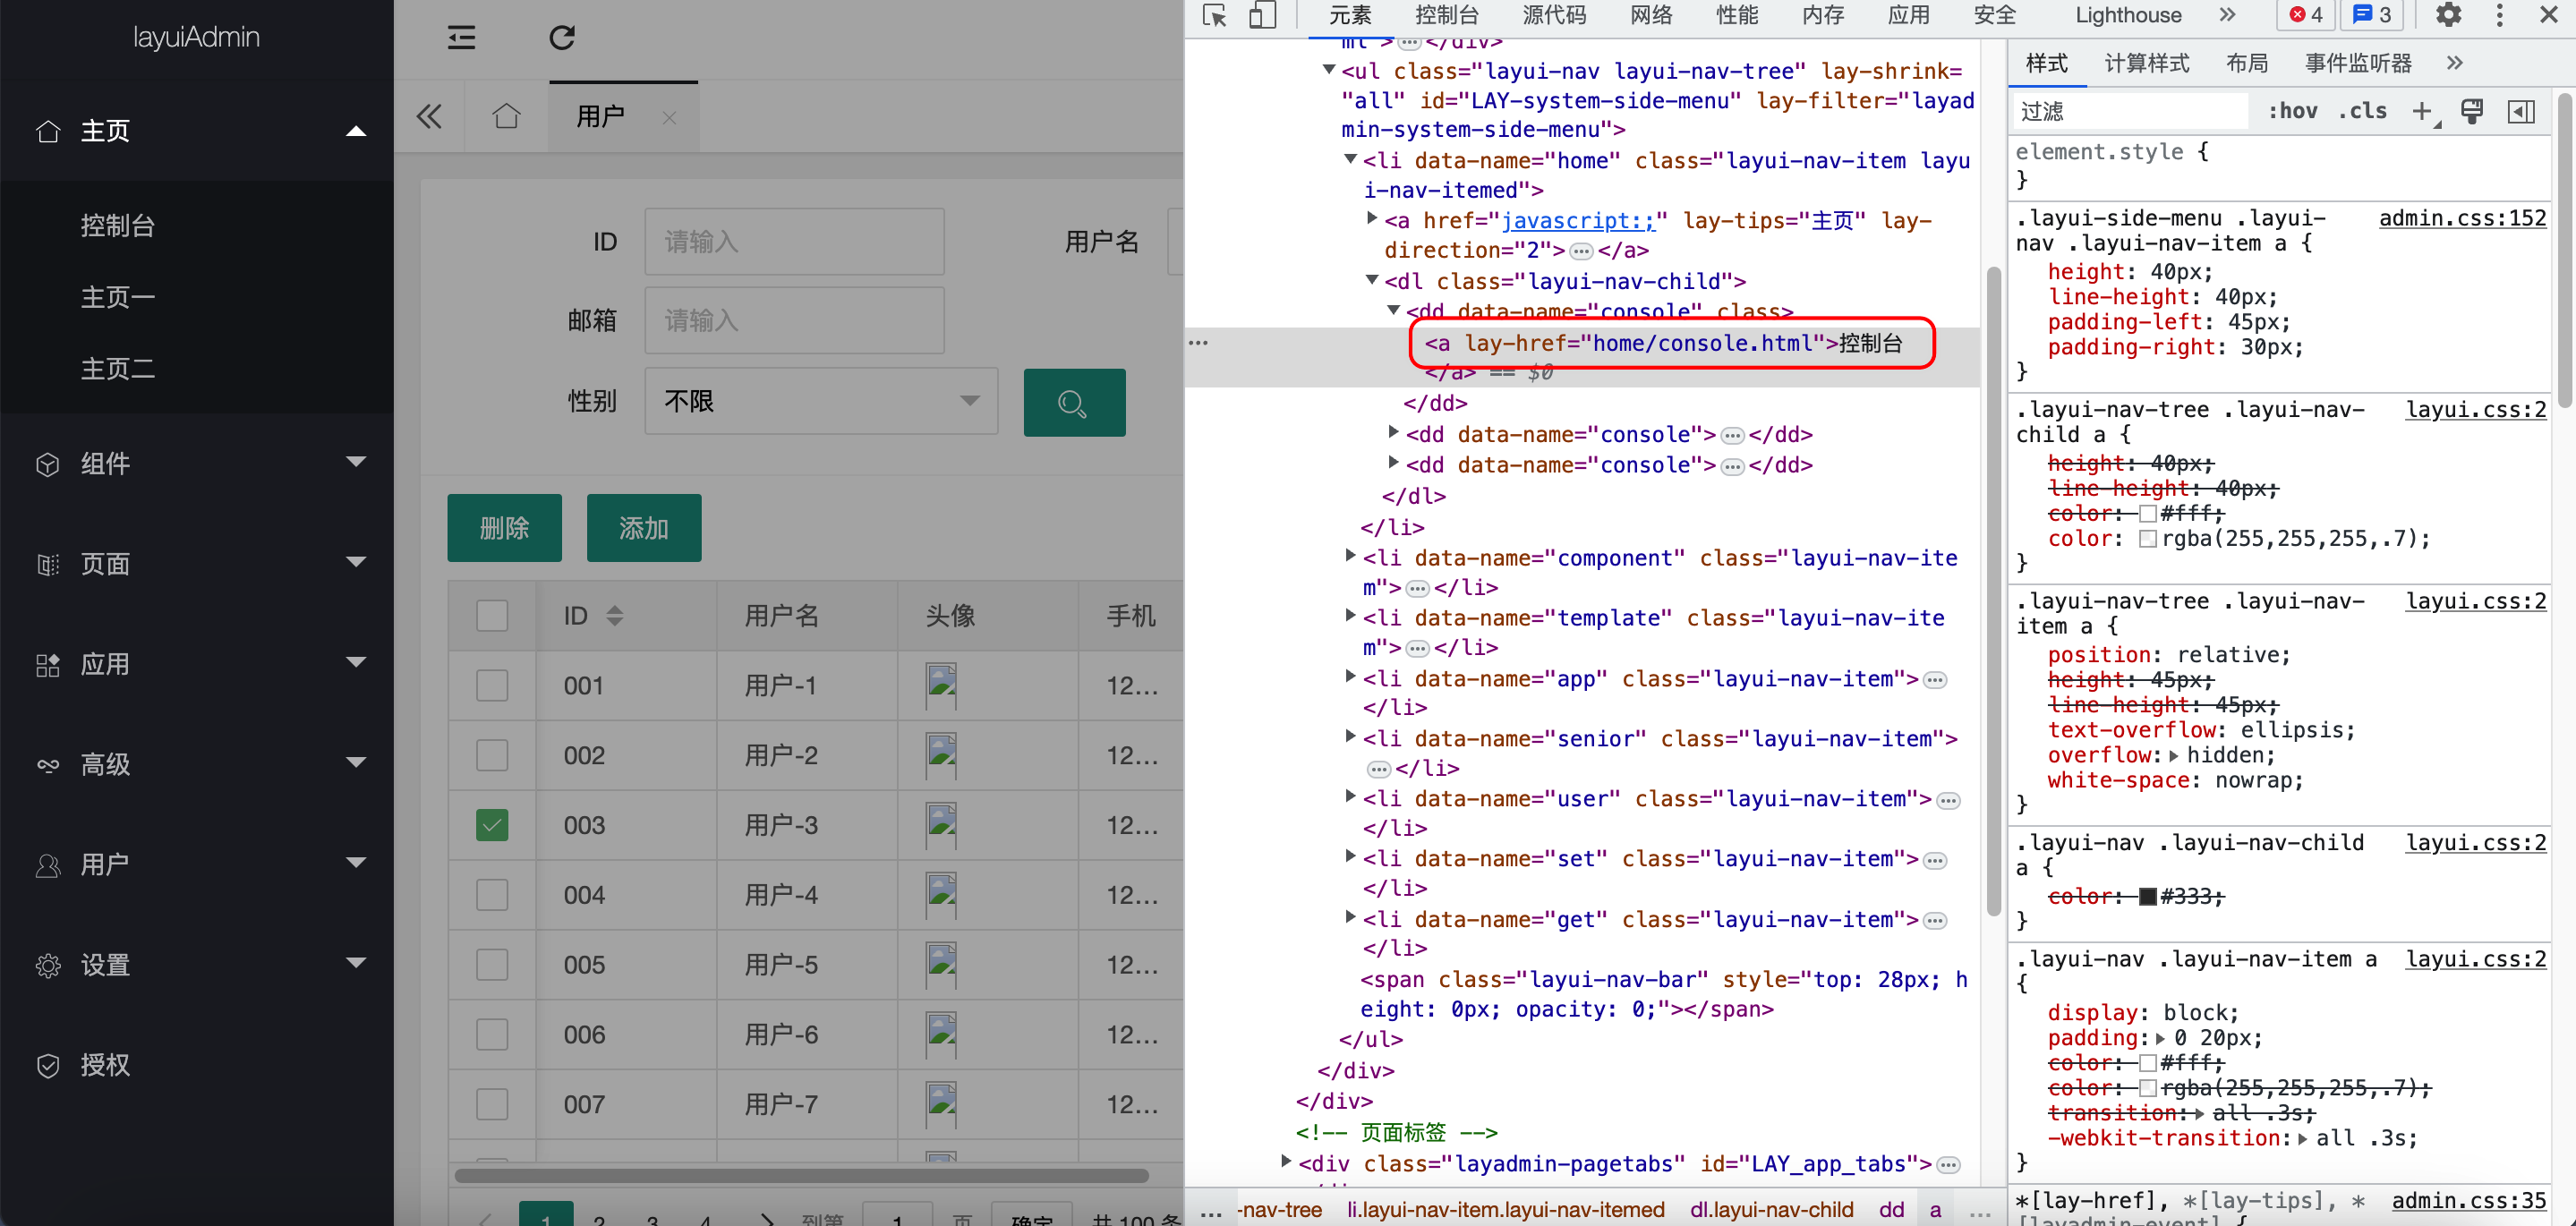
LayUI嵌套页面纯前端切换
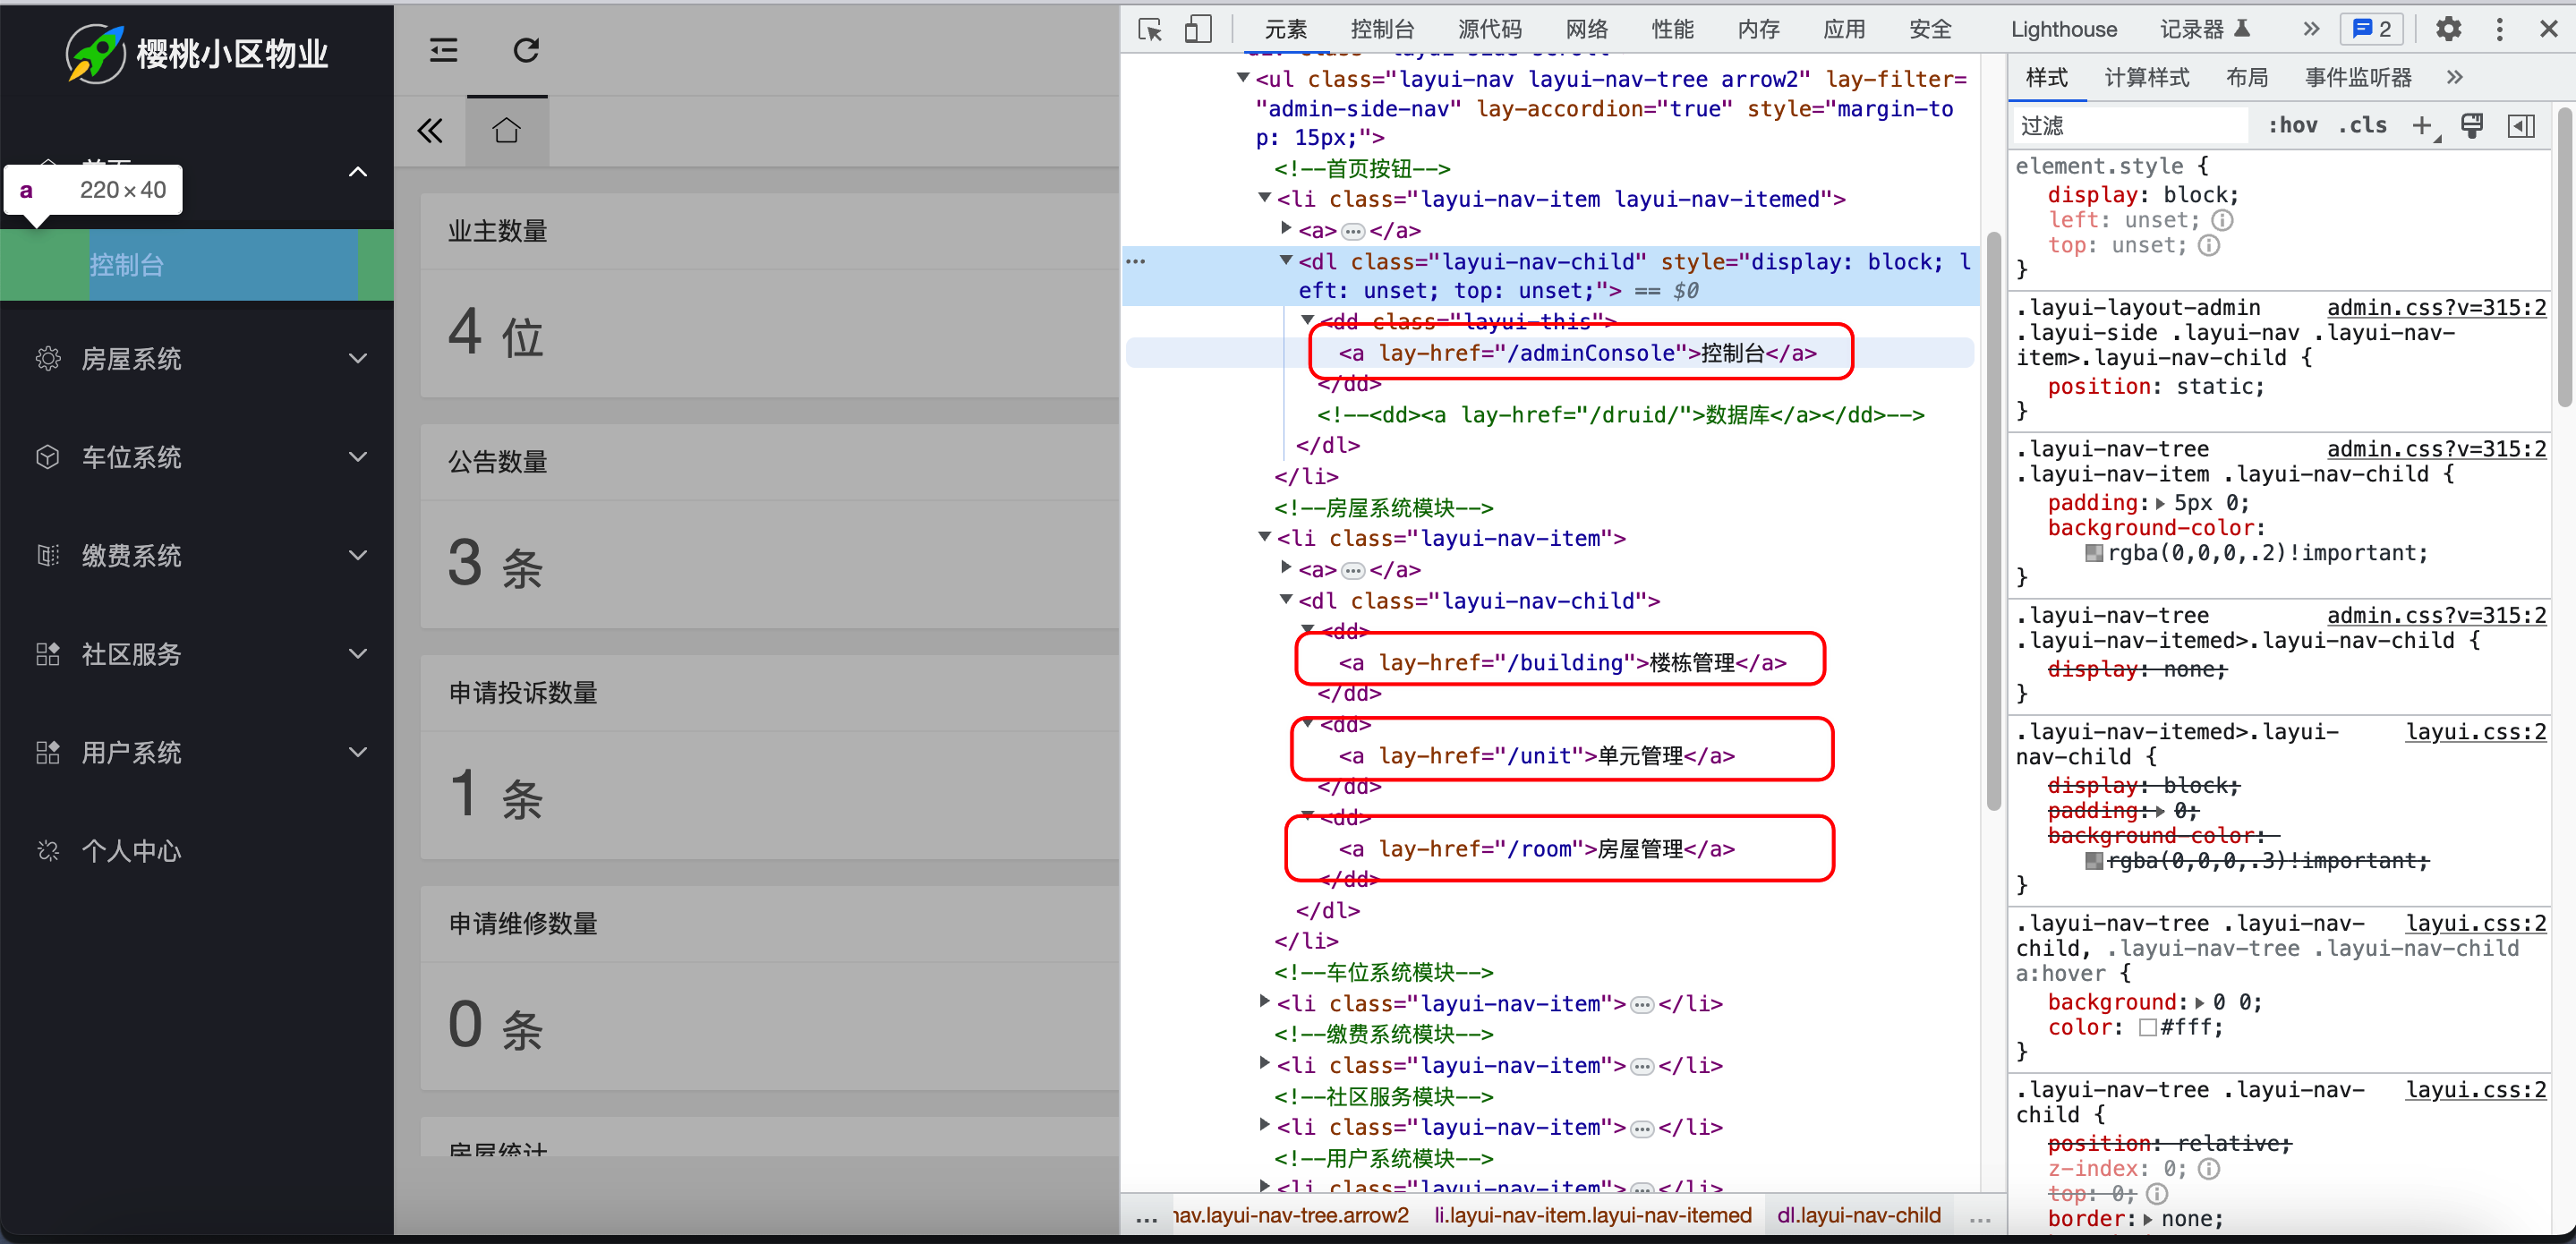
- LayUIAdmin(使用lay-href进行html页面跳转)
- LayUImini(使用layui-href进行html页面跳转)
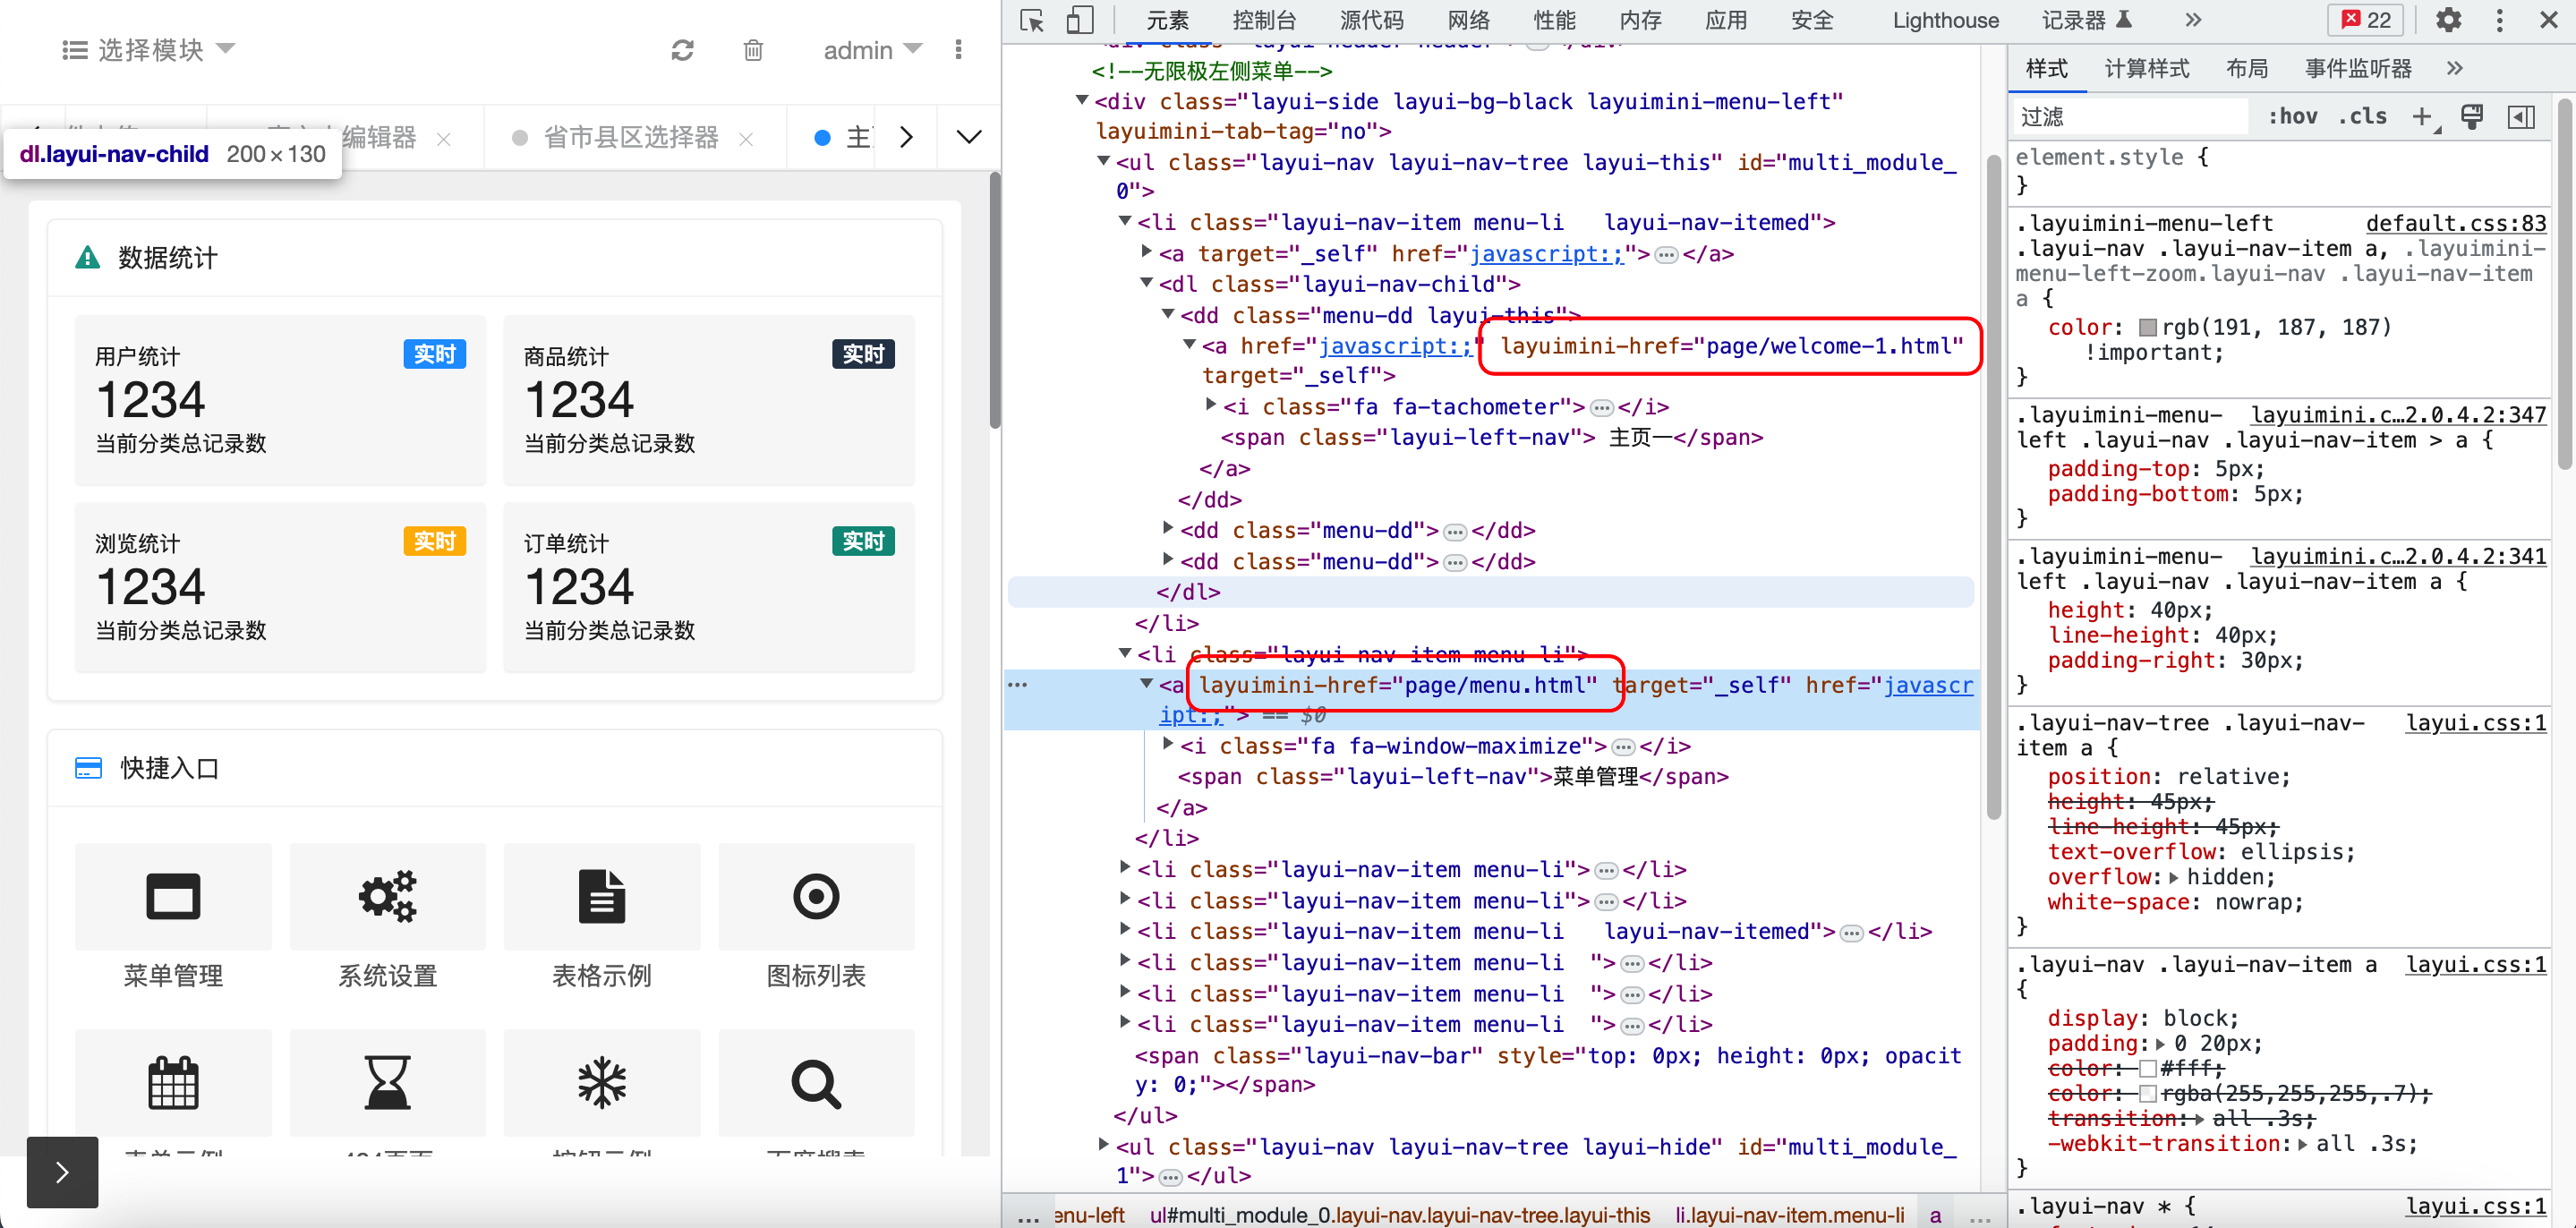
LayUI+Controller页面跳转
1
2
3
4
5
6
7
8
9
10
11
12
13
14
15
16
17
18
19
20
21
22
23
24
25
26
|
<li class="layui-nav-item">
<a><i class="layui-icon layui-icon-home"></i> <cite>首页</cite></a>
<dl class="layui-nav-child">
<dd><a lay-href="/adminConsole">控制台</a></dd>
</dl>
</li>
<li class="layui-nav-item">
<a><i class="layui-icon layui-icon-set"></i> <cite>房屋系统</cite></a>
<dl class="layui-nav-child">
<dd><a lay-href="/building">楼栋管理</a></dd>
<dd><a lay-href="/unit">单元管理</a></dd>
<dd><a lay-href="/room">房屋管理</a></dd>
</dl>
</li>
<li class="layui-nav-item">
<a><i class="layui-icon layui-icon-component"></i> <cite>车位系统</cite></a>
<dl class="layui-nav-child">
<dd><a lay-href="/car">车位管理</a></dd>
</dl>
</li>
|
Controller常用接受数据注解
@PathVariable注解和@RequestParam注解都是用来接收请求参数的注解,但它们的作用略有区别。
@RequestParam注解用于获取请求中的查询参数,也就是URL中问号后面的参数。例如:
1
2
3
4
5
6
| @GetMapping("/getUser")
public User getUser(@RequestParam("userId") Integer userId) {
User user = userRepository.findById(userId).orElse(null);
return user;
}
|
而@PathVariable注解用于获取URL路径中的变量值。例如:
1
2
3
4
5
6
| @GetMapping("/getUser/{userId}")
public User getUser(@PathVariable("userId") Integer userId) {
User user = userRepository.findById(userId).orElse(null);
return user;
}
|
@RequestBody注解则用于接收请求体中的数据,通常用来接收JSON格式的数据,在后端将其转换为Java对象进行处理。例如:
1
2
3
4
5
6
| @PostMapping("/addUser")
public User addUser(@RequestBody User user) {
User savedUser = userRepository.save(user);
return savedUser;
}
|
总之,这三个注解都是SpringBoot中用来接收请求参数的常用注解,根据不同的场景选择使用即可。
请求携带数据(RequestParam)
HTML网页中的表单和按钮:
1
2
3
4
5
6
| <form id="form">
<label for="userId">用户ID:</label>
<input type="text" name="userId" id="userId">
<br>
<button type="submit">查询</button>
</form>
|
前端代码(使用LayUI和jQuery):
1
2
3
4
5
6
7
8
9
10
11
12
13
14
15
16
17
18
19
20
21
22
23
24
25
|
$("#form").submit(function(event) {
event.preventDefault();
var userId = $("#userId").val();
$.ajax({
url: "/api/getUser",
type: "GET",
data: {
userId: userId
},
dataType: "json",
success: function(result) {
console.log(result);
},
error: function(xhr, status, error) {
console.error(error);
}
});
});
|
后端代码(使用SpringBoot):
1
2
3
4
5
6
7
8
9
10
11
12
13
14
| @RestController
@RequestMapping("/api")
public class UserController {
@GetMapping("/getUser")
public User getUser(@RequestParam("userId") Integer userId) {
User user = userRepository.findById(userId).orElse(null);
return user;
}
}
|
以上代码中,前端使用了LayUI框架来进行页面布局,通过jQuery监听表单提交事件,在提交时获取表单数据,并通过Ajax向后端发送GET请求,其中包含一个userId参数。后端使用@RequestParam注解来接收该参数,并根据该参数查询用户信息,在其响应中返回查询到的用户信息。
请求携带数据(PathVariable)
HTML网页中的标签和按钮:
1
2
3
4
| <label for="userId">用户ID:</label>
<input type="text" name="userId" id="userId">
<br>
<button id="btn-search">查询</button>
|
前端代码(使用LayUI和jQuery):
1
2
3
4
5
6
7
8
9
10
11
12
13
14
15
16
17
18
19
20
|
$("#btn-search").click(function() {
var userId = $("#userId").val();
$.ajax({
url: "/api/getUser/" + userId,
type: "GET",
dataType: "json",
success: function(result) {
console.log(result);
},
error: function(xhr, status, error) {
console.error(error);
}
});
});
|
后端代码(使用SpringBoot):
1
2
3
4
5
6
7
8
9
10
11
| @RestController
@RequestMapping("/api")
public class UserController {
@GetMapping("/getUser/{userId}")
public User getUser(@PathVariable("userId") Integer userId) {
User user = userRepository.findById(userId).orElse(null);
return user;
}
}
|
以上代码中,前端通过监听按钮点击事件来获取输入框中的值,并将其作为URL路径的一部分发送到后端。后端使用@PathVariable注解来接收这个参数,并根据该参数查询用户信息,在其响应中返回查询到的用户信息。
如果不使用@PathVariable注解来接收参数,SpringBoot将会尝试将请求参数的名称与方法参数的名称匹配。如果它们匹配成功,SpringBoot会自动赋值。
例如:
1
2
3
4
5
6
| @GetMapping("/getUser/{userId}")
public User getUser(Integer userId) {
User user = userRepository.findById(userId).orElse(null);
return user;
}
|
在上述示例中,如果接收到一个名为”userId”的请求参数,SpringBoot会自动将其赋值给方法参数”userId”。
但是,为了避免潜在的问题,建议使用@PathVariable注解来明确指定路径变量的名称。这样可以保证代码更加健壮和可读性好。
请求携带数据(RequestBody)
HTML网页中的标签和按钮:
1
2
3
4
5
6
7
| <label for="name">姓名:</label>
<input type="text" name="name" id="name">
<br>
<label for="age">年龄:</label>
<input type="number" name="age" id="age">
<br>
<button id="btn-save">保存</button>
|
前端代码(使用LayUI和jQuery):
1
2
3
4
5
6
7
8
9
10
11
12
13
14
15
16
17
18
19
20
21
22
23
24
25
26
27
28
29
|
$("#btn-save").click(function() {
var name = $("#name").val();
var age = $("#age").val();
var data = {
name: name,
age: age
};
$.ajax({
url: "/api/addUser",
type: "POST",
contentType: "application/json;charset=utf-8",
data: JSON.stringify(data),
dataType: "json",
success: function(result) {
console.log(result);
},
error: function(xhr, status, error) {
console.error(error);
}
});
});
|
后端代码(使用SpringBoot):
1
2
3
4
5
6
7
8
9
10
11
| @RestController
@RequestMapping("/api")
public class UserController {
@PostMapping("/addUser")
public User addUser(@RequestBody User user) {
User savedUser = userRepository.save(user);
return savedUser;
}
}
|
以上代码中,前端通过监听按钮点击事件来获取输入框中的数据,并将其构造成JSON格式的请求参数发送到后端。后端使用@RequestBody注解来接收这个数据,并将其反序列化为Java对象,最后保存到数据库中。在响应中返回保存的用户信息。
需要注意的是,由于前端发送的是JSON字符串类型的数据,所以在Ajax请求中需要设置contentType为”application/json;charset=utf-8”,并将请求参数转换为JSON字符串后发送。后端也需要通过ObjectMapper等工具类将JSON字符串反序列化成Java对象。